As a homeowner, ensuring the integrity of your roof is paramount, and one of the often overlooked yet critical components is the flashing around chimneys. This essential roofing element serves as a protective barrier against water intrusion, preventing leaks that can lead to extensive damage both inside and outside your home. Unfortunately, over time, the elements can take their toll, leading to deterioration or even complete failure of the flashing. But fear not! Whether you’re a seasoned DIY enthusiast or a first-time homeowner, understanding the process of repairing flashing around chimneys is not only achievable but also rewarding. In this article, we will explore the common causes of flashing damage, the tools and materials you'll need for effective repairs, and step-by-step instructions to guide you through the process.
With the right knowledge and a bit of effort, you can restore your chimney’s flashing and enhance your roof’s durability. So grab your toolbelt and let’s dive into this vital home repair that can save you time and money in the long run!Homeowners often face challenges with repairing flashing around chimneys, especially when it comes to identifying the right materials and ensuring that repairs are effective. The first step in addressing any issues is understanding the types of materials used for chimney flashing. Common materials include aluminum, which is lightweight and resistant to rust; copper, known for its durability and aesthetic appeal, though it comes at a higher cost; and lead, which is pliable and can create a watertight seal, but is less commonly used today due to health concerns.
Each material has its own set of advantages and disadvantages, and the choice often depends on the specific needs of the home and budget considerations. When it comes to inspecting flashing for damage, a systematic approach is essential. Start by examining the flashing around the chimney for visible signs of wear, such as cracks, rust, or separation from the chimney or roof. Next, check the caulk around joints where the flashing meets the roof. If you notice any gaps or deteriorated caulk, it's time to perform repairs.
The process begins with removing old caulk using a putty knife or a similar tool. Be careful not to damage the underlying materials during this step. Once the old caulk is removed, clean the area thoroughly to ensure a proper seal when re-caulking. After cleaning, apply a high-quality roofing sealant specifically designed for chimneys and flashing. Use a caulking gun to apply an even bead of sealant along the joints, ensuring that all gaps are filled.
If you find any sections of flashing that are significantly damaged or rusted through, you may need to replace those sections entirely. To do this, carefully detach the damaged piece, taking care not to disturb adjacent flashing or roofing materials. Measure and cut a new piece of flashing to size, then install it by overlapping it with existing flashing and securing it in place with roofing nails or screws. While performing repairs on chimney flashing can be straightforward, there are common mistakes that homeowners should avoid. One major mistake is not thoroughly cleaning the area before applying new caulk or sealant; debris can prevent a proper bond, leading to future leaks.
Additionally, applying too much sealant can cause it to ooze out and create an unsightly mess instead of forming a clean seal. Always ensure that your new flashing overlaps existing materials correctly to minimize potential leaks. Understanding when to consult a professional versus taking a DIY approach is crucial for homeowners. If you are uncomfortable working at heights or if the damage appears extensive, it's best to hire a professional roofer who specializes in chimney repairs. They have the experience and tools necessary to perform repairs safely and effectively.
On the other hand, if you have some basic handyman skills and the damage is minor, such as simple caulking or replacing small sections of flashing, a DIY approach may be feasible. The costs associated with repairing flashing around chimneys can vary widely based on several factors. Labor costs differ depending on your location, and if you choose to hire professionals, you may also need to account for service fees associated with their expertise. Material costs can range from inexpensive options like aluminum to higher-end choices like copper. Overall, homeowners should budget between $200 to $800 for repairs, depending on the extent of damage and whether they opt for professional assistance. Regular maintenance is key to prolonging the life of chimney flashing and preventing costly repairs down the line.
Homeowners should inspect their chimney flashing at least twice a year—ideally in spring and fall—to check for any signs of damage or wear. Additionally, clearing debris from gutters and downspouts will help direct water away from the chimney area, reducing strain on the flashing. Keeping an eye out for any signs of water stains inside your home or on the exterior walls around your chimney can also alert you to potential problems early on. By taking a proactive approach to repairing flashing around chimneys, homeowners can protect their homes from water damage and extend the lifespan of their roofing system.
When to Call a Professional
While many homeowners may feel confident in tackling minor repairs, repairing flashing around chimneys can sometimes be more complex than it appears. There are specific signs that indicate it might be time to call in a professional. First, if you notice significant water stains on your ceiling or walls near the chimney, this could be a clear sign of a leak that needs immediate attention.Additionally, if the flashing appears rusted or damaged, it is often best to consult with an expert who can assess the situation accurately. Another indicator is if you have difficulty locating the source of the leak or damage. Sometimes, what seems like a simple issue can be part of a larger problem that requires professional evaluation. If you find yourself climbing onto your roof and feeling unsure about your safety or the repair process, it’s wise to seek help. Professionals are equipped with the necessary tools and knowledge to ensure the job is done safely and effectively. Lastly, if your home is older or has previously undergone extensive repairs, there may be underlying issues that only a trained eye can identify.
In such cases, contacting a roofing specialist can save you time and prevent further damage down the line.
Understanding Chimney Flashing
Chimney flashing is a critical component of your roofing system, designed to create a watertight seal around the chimney where it intersects with the roof. Its primary function is to prevent water from seeping into your home, which can lead to significant damage over time. The materials commonly used for chimney flashing include metal, typically aluminum or galvanized steel, and in some cases, copper for its durability and resistance to corrosion. These metals are favored due to their ability to withstand harsh weather conditions, including heavy rains and high winds, while maintaining their integrity over time. Properly installed chimney flashing is essential because it directs water away from the chimney and prevents it from pooling around the base. Without effective flashing, water can infiltrate the chimney structure, leading to leaks and severe water damage inside the home.Homeowners should regularly inspect their chimney flashing for signs of wear or damage, such as rust spots on metal flashing or gaps where the flashing meets the roof. In summary, understanding the materials and function of chimney flashing is vital for maintaining your home’s integrity and preventing costly repairs down the line.
Cost Estimates for Repairs
When it comes to repairing flashing around chimneys, understanding the costs involved is crucial for homeowners. Several factors can significantly affect the overall price of these repairs. Firstly, the extent of the damage plays a major role in determining costs. Minor issues, such as small leaks or loose flashing, may only require simple repairs or resealing, which can be relatively inexpensive. However, if the damage is extensive, involving water penetration or rot in surrounding areas, costs can escalate quickly due to the need for more comprehensive repairs. Secondly, the materials used for flashing repairs can influence the price.Traditional materials like aluminum or galvanized steel tend to be more affordable, while copper flashing, known for its durability and aesthetic appeal, can be more expensive. Homeowners should also consider whether they want to replace existing flashing or opt for a higher-quality material that could last longer. Labor costs are another critical factor. Depending on the region and the contractor's expertise, labor rates can vary significantly. It's essential to get multiple quotes from reputable roofing contractors to ensure a fair price.
Additionally, some contractors may offer warranties on their work, which could provide long-term savings if future issues arise. Lastly, accessibility to the chimney can impact repair costs. If the chimney is difficult to reach or requires special equipment for repairs, this may increase labor costs due to the additional time and resources needed. In summary, when budgeting for repairing flashing around chimneys, homeowners should consider the extent of damage, material choices, labor rates, and accessibility factors to arrive at a comprehensive cost estimate.
Maintaining Your Chimney Flashing
To ensure the longevity of your chimney flashing and to prevent potential leaks, regular maintenance is essential.Repairing flashing around chimneys
starts with a proactive approach to upkeep. Here are some tips to help you maintain your chimney flashing effectively:1.Regular Inspections: Make it a habit to inspect your chimney flashing at least twice a year, preferably in the spring and fall.Look for any signs of damage such as rust, cracks, or gaps where water could enter. Early detection can save you from costly repairs later on.
2.Clean the Surrounding Area:
Ensure that the area around your chimney is free from debris, such as leaves or branches. Clogged gutters can lead to water pooling around the chimney, which may compromise the integrity of the flashing.3.Check Seals and Caulking:
Over time, the seals and caulking around your chimney flashing can deteriorate. Inspect these areas for any signs of wear and replace them as necessary to maintain a watertight seal.4.Trim Overhanging Branches:
If you have trees near your home, consider trimming overhanging branches that could potentially damage the flashing during storms or high winds.This will help minimize the risk of physical damage to your chimney and flashing.
5.Professional Inspections:
If you notice any significant wear or damage during your inspections, it may be wise to call in a professional roofer who can assess the situation more thoroughly. They can provide expert advice and perform necessary repairs. By following these maintenance tips, homeowners can effectively avoid issues related to repairing flashing around chimneys, ensuring their roofs remain in good condition for years to come.Repair Techniques for Chimney Flashing
Repairing flashing around chimneys is crucial for maintaining the integrity of your roof and preventing water damage to your home. Here are some detailed instructions on how to perform these repairs effectively.Step 1: Assess the Damage
Before starting any repair work, it is essential to assess the condition of your chimney flashing. Look for signs of rust, cracks, or missing sections.If you notice any gaps where water could penetrate, it's time to take action.
Step 2: Gather Your Tools and Materials
You will need a few essential tools and materials to repair flashing around chimneys: a pry bar, roofing cement, a caulking gun, replacement flashing materials (aluminum or galvanized steel), a utility knife, a hammer, and roofing nails.Step 3: Remove Damaged Flashing
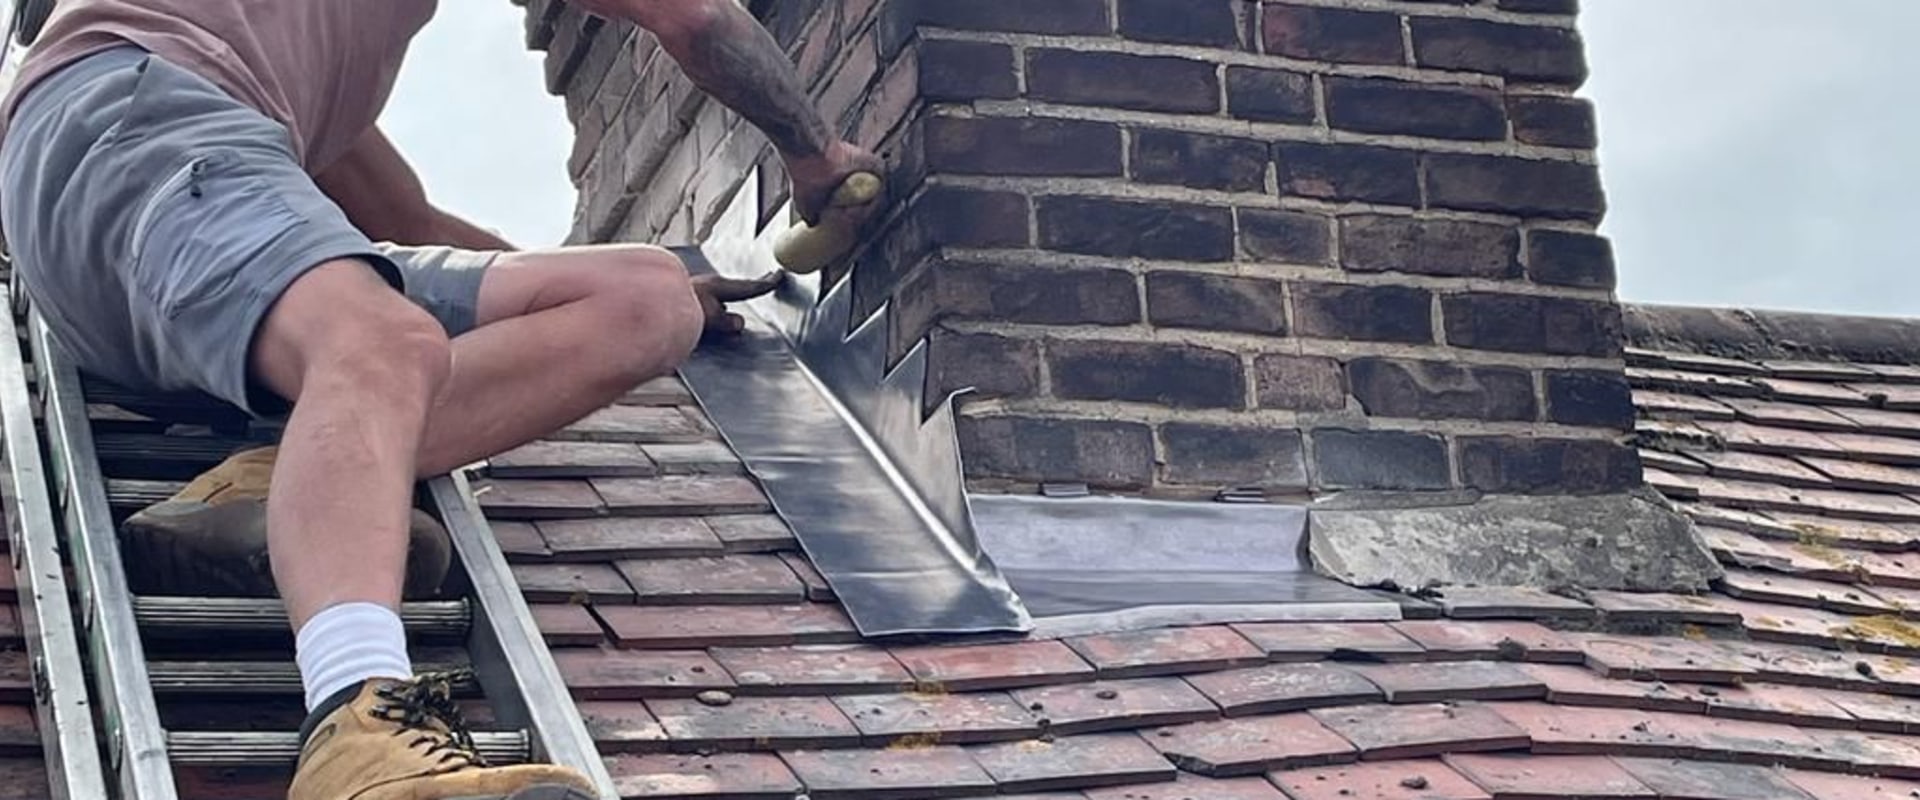
Use the pry bar to carefully lift the damaged flashing from around the chimney. Take care not to damage the surrounding shingles or roofing materials. If the flashing is rusted or cracked, it should be replaced completely.Step 4: Install New Flashing
Cut the new flashing material to size, ensuring it overlaps the shingles below and extends up the sides of the chimney. Position the new flashing in place and secure it with roofing nails.Ensure that it fits snugly against the chimney and shingles for optimal protection.
Step 5: Seal the Edges
Apply roofing cement along the edges of the newly installed flashing to create a watertight seal. Use a caulking gun for precision and ensure that there are no gaps where water can enter.Step 6: Inspect Your Work
After completing the repair, inspect your work to make sure everything is secure and sealed properly. Look for any areas that might need additional sealing or reinforcement. By following these steps, you can effectively repair flashing around chimneys and protect your home from potential leaks and water damage.Inspecting Your Chimney Flashing
When it comes to repairing flashing around chimneys, the first step is to thoroughly inspect the area for any signs of damage. This process can help you identify issues before they turn into larger, more expensive problems.Here’s a step-by-step guide to check for damage:1.Safety First: Before you begin your inspection, ensure that you have the proper safety equipment. Use a sturdy ladder to access your roof safely, and consider wearing a harness if your roof has a steep pitch.
2.Visual Inspection:
Start by examining the chimney flashing from the ground if possible. Look for any visible gaps or cracks between the flashing and the chimney or roof. Pay attention to areas where different materials meet, as these are often prone to leaks.3.Closer Look:
If it’s safe to do so, climb up to the roof and examine the flashing closely.Check for rust, corrosion, or any loose sections that may indicate deterioration. Ensure that the flashing is properly sealed against the chimney and roof.
4.Check for Water Damage:
Look for any signs of water damage around the chimney, such as stains on your ceiling or walls inside your home. This could indicate that water is getting through compromised flashing.5.Inspect Surrounding Areas:
Don’t forget to check the shingles or roofing material surrounding the flashing. Damaged shingles can also lead to water infiltration, exacerbating problems with your chimney flashing.6.Document Findings:
Make notes or take pictures of any issues you find during your inspection.This documentation will be useful if you need to consult a professional for repairs. By following these steps, homeowners can effectively assess the condition of their chimney flashing and take action before minor issues develop into serious problems. In conclusion, maintaining chimney flashing is crucial for safeguarding your home from potential leaks and water damage. Homeowners should be vigilant and act promptly if they observe any signs of wear, such as rust, cracks, or loose materials. Addressing these issues early can save you from more extensive repairs down the line. Whether you choose to undertake DIY repairs or seek professional help, it is important to assess the severity of the problem. For minor issues, a little effort can go a long way, but for more significant damage, enlisting the expertise of a professional is advisable.
Taking action now will ensure the longevity and integrity of your roof and chimney.